
Beef Short Ribs Gordon Ramsay Recipe
This beef short ribs Gordon Ramsay recipe gives you ribs that are rich, sticky and so soft you can cut them with a spoon. The meat slides off the bone. The sauce is deep, glossy and full of red wine. You only need ten ingredients, and the oven does most of the work. Allow about four hours in total.
Ramsay shares this dish in his book, Gordon Ramsay Ultimate Cookery Course, published in 2013. It is a classic British-style braise (meat cooked slowly in liquid). There is no fancy kit and no hard technique. You brown, you simmer, you wait.
The clever part is the finish. You squeeze the soft roasted garlic out of its skin and rub it through a sieve. It goes back into the sauce and makes it silky. Small step. Big payoff.
Give it a go this weekend. Then tell us how it turned out in the comments.
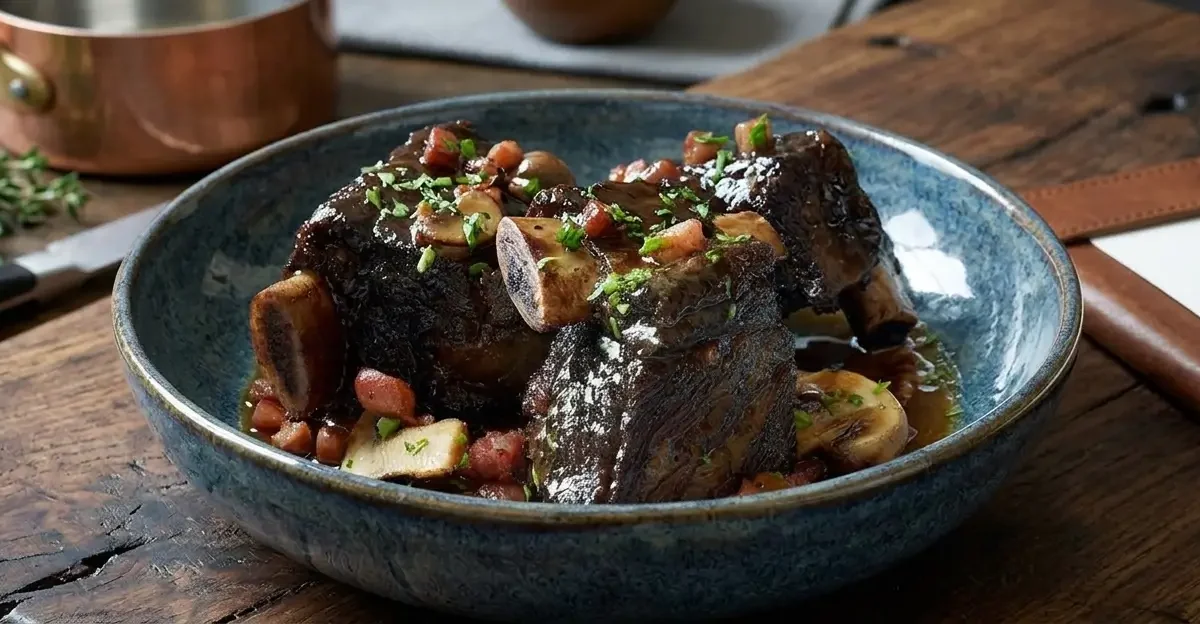
Beef Short Ribs Gordon Ramsay Recipe
Brown six thick short ribs, then braise them in a bottle of red wine and a litre of beef stock at 170°C for 3 to 4 hours. Finish with crisp pancetta, mushrooms and a smooth garlic sauce.
🛒 Ingredients
Click to check off- For the ribs and sauce
- To finish
👨🍳 Step-by-Step Method
-
Heat the oven
Set it to 170°C (150°C fan, 340°F, Gas 3).
-
Brown the ribs
Heat a large, heavy frying pan over a medium-high heat with a little oil. Add the ribs and fry for 10 to 15 minutes, turning, until deep brown all over. Work in batches so the pan is not crowded. Move the ribs to a roasting tin or ovenproof dish. Go easy on the oil, because the ribs will give off their own fat.
-
Cook the garlic and purée
Put the garlic halves in the same pan, cut side down. Stir in the tomato purée. Cook for 1 to 2 minutes, until the purée darkens and smells sweet.
-
Reduce the wine
Pour in the wine and scrape up the sticky brown bits from the pan. Boil, then simmer for 10 to 15 minutes, until the wine has shrunk by half.
-
Add the stock
Pour in the stock. Tip the garlic and liquid over the ribs so they are nearly covered. Bring it back to the boil, spooning the liquid over the meat as it bubbles.
-
Braise slowly
Cover the tin with foil and slide it into the oven. Cook for 3 to 4 hours, spooning the liquid over the ribs every so often. They are ready when the meat is soft and slips away from the bone.
-
Crisp the pancetta
About 10 minutes before the ribs finish, fry the pancetta in a hot, dry pan for 2 to 3 minutes, until crisp and golden.
-
Cook the mushrooms
Add the mushrooms to the pancetta. Fry for 4 to 5 minutes, until soft and the fat has cooked off. Tip both into a bowl and set aside.
-
Make the sauce
Lift the ribs onto a serving dish. Squeeze the soft garlic out of its skins into a bowl and push it through a sieve. Spoon the fat off the cooking liquid, then strain the liquid through a sieve. Stir in the garlic. If it looks thin, boil it for 10 to 15 minutes more, until it coats a spoon.
-
Serve
Pile the pancetta and mushrooms on top of the ribs. Spoon the sauce around them. Scatter over the parsley.
📝 Recipe Notes
Oven temperature: 170°C, 150°C fan, 340°F, Gas mark 3. Handy tip: Lay a sheet of greaseproof paper (parchment paper) under the foil. Wine is acidic and can react with bare foil. If your tin is small, use a little less stock so the ribs are only just covered.
Make Ahead and Reheating
This dish loves a head start. Cook the ribs a day ahead, then cool and chill them in their sauce. The fat sets in a layer on top, so you can lift it off in one go. Reheat the ribs, covered, at 150°C (130°C fan, 300°F, Gas 2) for about 30 minutes. Or warm them gently on the hob. Crisp the pancetta and mushrooms fresh, just before serving.
Storing and Freezing Leftovers
Keep leftovers in an airtight container in the fridge for up to 3 days. Freeze the ribs and sauce together for up to 3 months. Defrost them overnight in the fridge, then reheat until piping hot all the way through.
Easy Swaps
No pancetta? Use smoked streaky bacon, chopped small. Chestnut mushrooms not in the shop? Button mushrooms work fine. Prefer to cook with less wine? Use a smaller amount of wine and top up with extra stock, but expect a lighter sauce.
Common Mistakes to Avoid
Crowding the pan. Ribs piled together steam and turn grey instead of brown. Cook them in batches. Rushing the browning. Colour is flavour. Give each side a proper go. Fierce heat in the oven. The ribs need a gentle, steady 170°C. Hotter than that and the meat turns tough. Skipping the fat skim. Without it, the sauce tastes greasy.

1 Comment